
What Is Zapier?
With Zapier you can easily connect and share data to and from the Investment Dominator with over 2000+ other web apps and saas systems. A complete app directory can be found at: https://zapier.com/apps
In this article, we are going to explain how to connect the Investment Dominator to Sendinblue, but first, let’s talk a little about Sendinblue…
What is Sendinblue?
Sendinblue is a digital marketing platform empowering B2B and B2C businesses, eCommerce sellers, and agencies to build customer relationships through end-to-end digital marketing campaigns, transactional messaging, and marketing automation.
How To Connect The Investment Dominator To Sendinblue
Step 1 – Create The Zap Workflow:
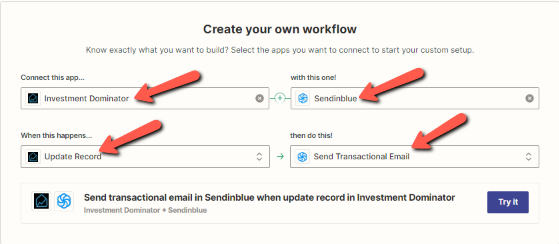
First, log in to Zapier.com, then from the dashboard and under the ‘Create your own workflow‘ section, search for “Investment Dominator” under the ‘Connect this app…‘ field.
Under the ‘with this one!‘ field search for “Sendinblue“.
Under the ‘When this happens…’ field select ‘Update Record‘.
And under the ‘then do this!‘ field select ‘Send Transactional Email‘:
Click the ‘Try it‘ button to continue with the setup.
Step 2 – Connect To Your Investment Dominator CRM:
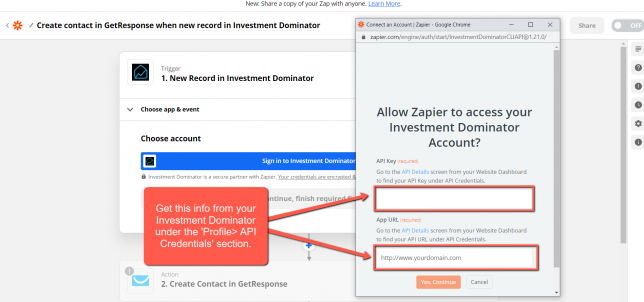
Click on the ‘Sign in to Investment Dominator‘ button and then in the allow popup, enter your API Key and App URL then click the ‘Try Connection‘ button.

NOTE: You can get both your API Key and App URL by logging into your Investment Dominator account as an Admin (with API Permissions enabled) under the ‘Profile> API Credentials‘ section.
Hit the ‘Continue‘ button on Zapier to keep going with the setup.
Step 3 – Setup The Zap Trigger
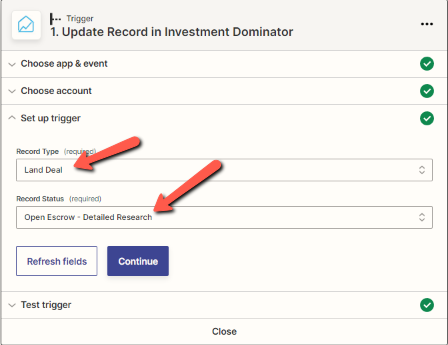
Under the ‘Record Type‘ field select ‘Land Deal‘.
Under the ‘Record Status‘ field select ‘Open Escrow – Detailed Research‘.
Click the ‘Continue‘ button to progress to the next step:
Step 4 – Connect to Sendinblue
Sendinblue requires An API key to be created in order to authorize data from Zapier.
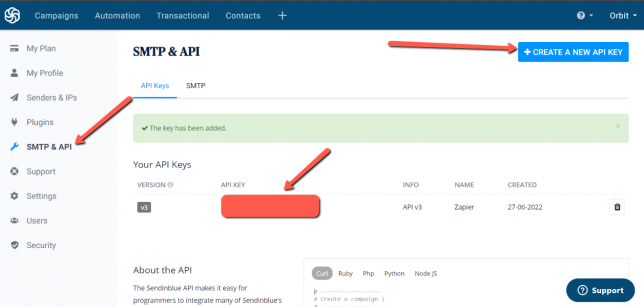
From your dashboard in Sendinblue click on the link for SMTP & API in order to see your API keys
If you do not have one created click on Create a New API Key
Now copy your code and head back to Zapier
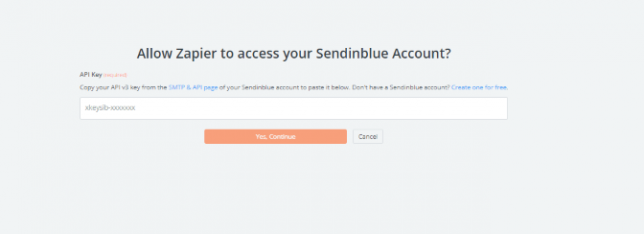
Paste your API Key to establish the connection to proceed.
Step 5 – Setup The Action
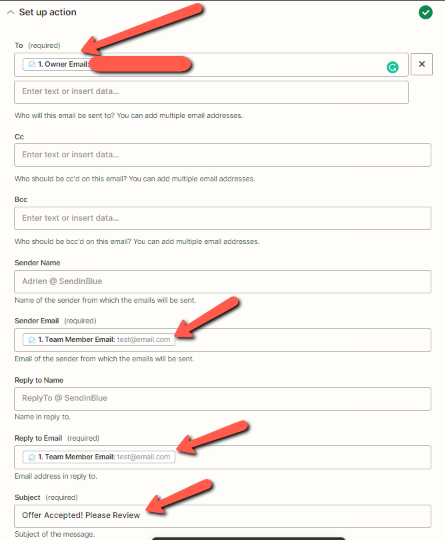
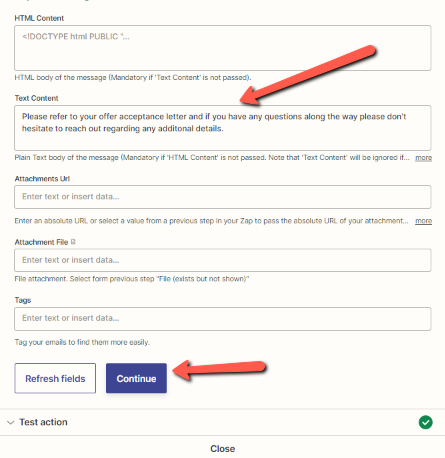
The following are required fields in order to send the proper data to Sendinblue this includes:
- Recipient email
- Sender email
- Text Content / HTML Content – (you should only choose one)
- Subject
When you begin to enter in information for these other optional fields you will see that you are able to pull in the data from the test record you chose.
The data you enter here should help provide any details you need to be attached to the created email click on continue.
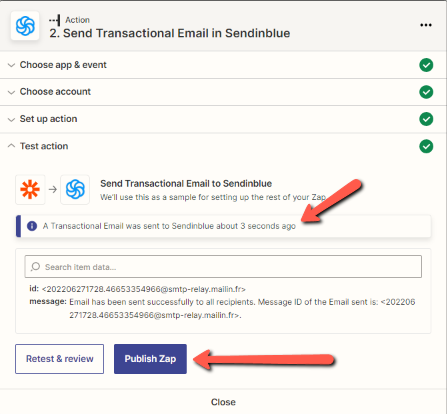
Now you will need to send a test to SendinBlue to ensure the Zap is working correctly I choose to do “Test and Review”
Then you will see a success message telling you the email was sent to Sendinblue.
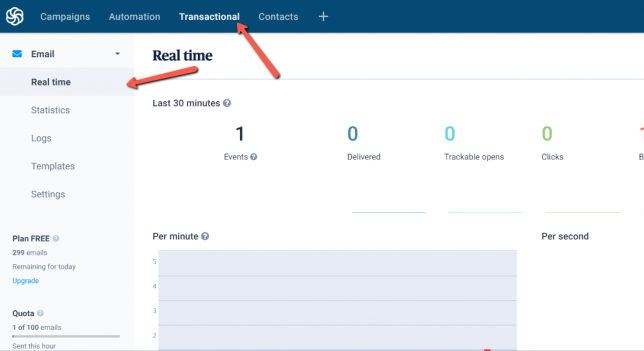

Now go to Sendinblue to ensure the information from the Zap is the way you want, once you confirm on Sendinblue head back to Zapier.
To review the email sent please go to your Sendinblue dashboard then click on the menu for Transactional -> Email -> Real-Time
Then scroll to the bottom to see the recent activity sent.
Click the ‘Publish Zap‘ button to complete the process.
Hooray! Now, when you are finalizing the process of offers sent you can use Sendinblue so that you can create an email with the new data being entered. There are a lot of possibilities that can be done with this connection so make sure to test your data to ensure accuracy!

