As you may know, the Investment Dominator includes features that can help to grow and expand your business to the next level, such as creating and assigning Tasks for your Users.
This was a huge update that we did to how tasks work so let’s make sure we cover everything you need to know to get started applying this to your business.
Here’s a list of some of the features which we will be going over
- Assign Tasks to members of your team
- Set deadlines and priorities with tasks
- Arrange tasks on the Calendar
- Set reminders for tasks through email or SMS
- Task Wizards
- Templated Checklists
Now if you are looking at your Investment Dominator you may not have any tasks set up already which is fine. Let’s walk through our first item of setting up a Task.
1. Creating Your First Task
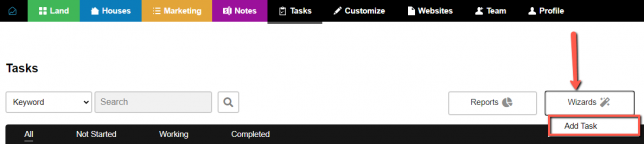

To get started click on the ‘Tasks‘ tab then select ‘Wizards > Add Task’ or go directly on ‘Tasks > Wizards > Add Task’.
With the help of our Wizard, we will get this done in no time and it will save our progress along the way.
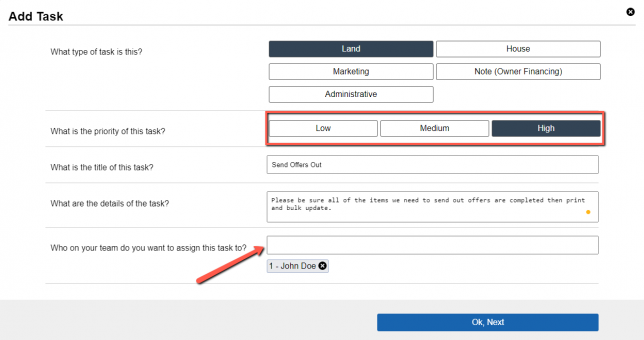
So first start off by declaring what ‘Type of Task’ this will be (depending on the section choice the color will be generated for that type of task, Green for Land, Blue for Houses, Orange for Marketing and Purple for Notes).
Then choose from the three options as to the ‘Priority of this Task’.
Please also make sure to leave details of the Task such as the ‘Title and the Details’.
Last make sure that you have ‘Team Members’ on your team to assign the task to if you haven’t read the article on Team Management click here.
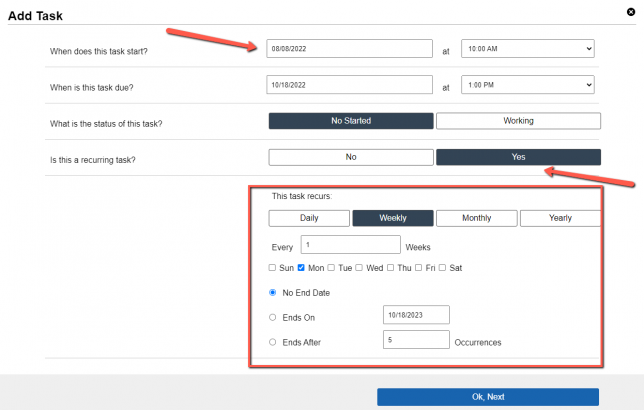
Now you will need to choose the ‘Start Date‘ and ‘End Date‘ for the task
Then choose the ‘Status of this Task‘ (has it been started or not started this will impact the progress bar)
The last item here is whether your ‘Task will be Recurring’ or not. (If you select no you can move on)
If you selected yes you will see the options for your task to occur you can have this repeat with the following option shown. Also, you have the option to have this go on every time until you provide an end date.
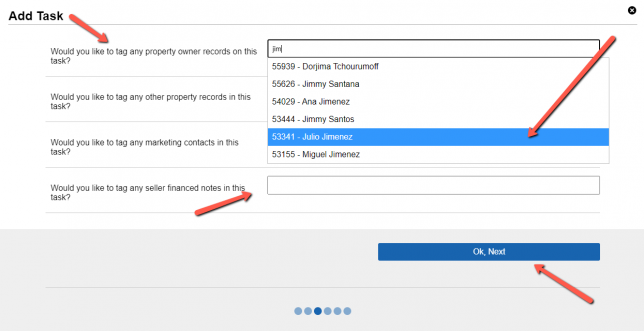
Now depending on your task, you can tag property owner records, marketing contacts, or seller financing notes.
To do so click on the field and begin to type the name of the record you can also use the owner id to attach to your task.
Click next when you’re ready.

You will now see a prompt to ‘Add a checklist’ or to-do list if this applies to you see later in the guide when we add this to an existing task.
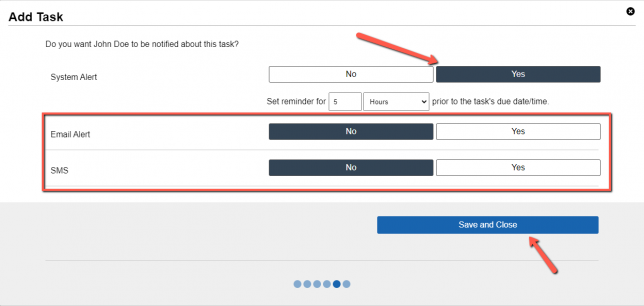
Now if you want to also notify this user about the tasks completion date you can set up reminders with three options
System alert, Email alert, and SMS
Then choose when you want your team member to be notified.
Click ‘Save and Close’ when you’re done.
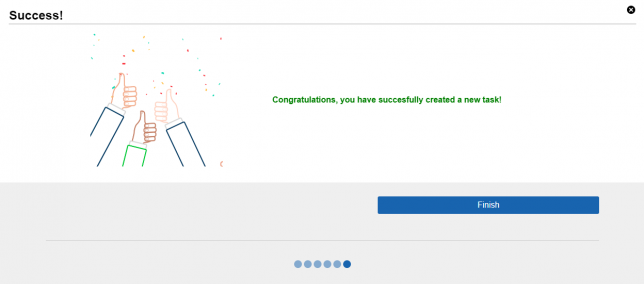
Now that you are done click finish to see your item on the Calendar view.
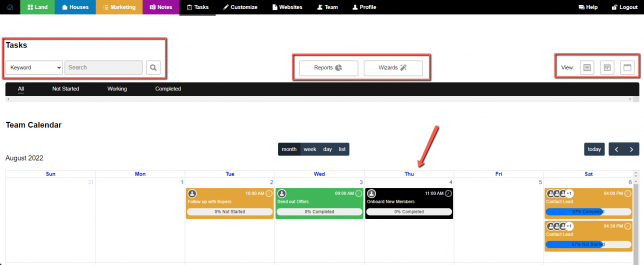
2. Viewing Your Task and Making Edits
Once your item is created you can freely move this around if you are using the Calendar view option to reschedule or make any changes as shown above.
Also if you need to edit any remaining details you can just click on your task.
For instance, let’s ‘Add a Checklist’ to our current task
3. Adding Checklist Items
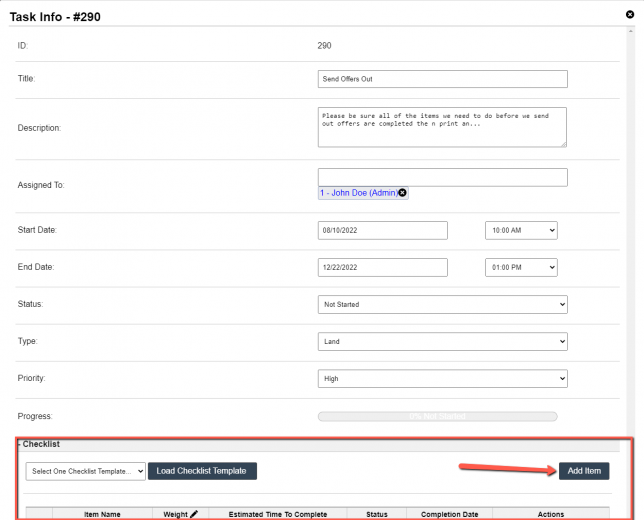
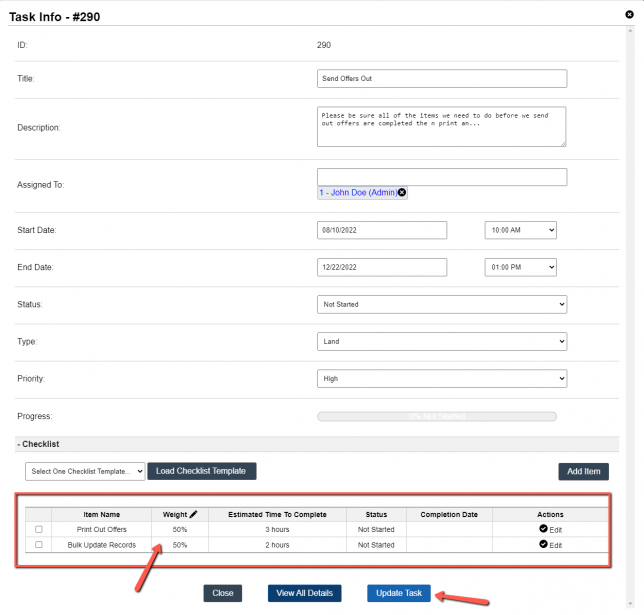
When you click on the task you can see all of the information we created and if you scroll down to the button you will see Checklist options.
You will be able to select a loaded checklist if one is available by clicking on the drop-down.
If you want to add new items to a checklist of items click on ‘Add Item’.
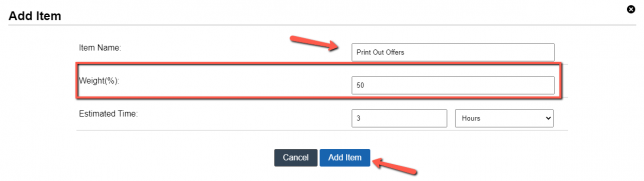
Here we can add the Item name and also the ‘Weight of this item’. Think of weight as a percentage if you have one item weight should be set to 100, if you have two or more you can assign the weight, but the total should be exactly 100.
We will add another item to show you how this will display when final.
Please be sure to review the article we did here about all updates to the calendar view that you can read here.