If you want to set up a Zap that for example sends an email to someone if their Investment Dominator Record is updated and is in the ‘Offer Sent‘ status but want to make sure the email only gets sent out one time then you are going to need to create a Zapier Filter that has a condition that prevents that. This article walks you through an example setup that prevents the email from being sent multiple times.
What Causes My Zap To Trigger Multiple Times?
Before we discuss the solution of how to prevent your zap from performing an action like sending an email from triggering multiple times, let’s first discuss why this happens in the first place.
If you create a simple Zap that sends out an email to a property owner when a property record in your Investment Dominator gets updated with the ‘Offer Sent‘ status, the workflow might look like this:
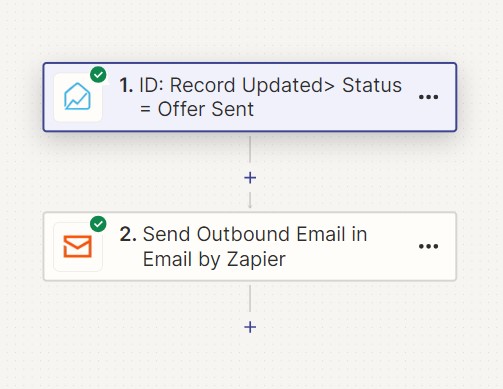
What this setup will do is any time the record is updated and is sitting in that ‘Offer Sent‘ status this Zap automation will run.
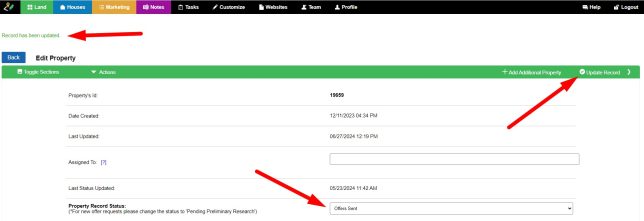
This means that even if you simply want to update the record with some additional details and then click the ‘Update Record‘ option to save that change, as long as the record is in the ‘Offer Sent‘ status you are triggering this zap. In other words, if you update your record multiple times in that status, multiple emails will be sent!:
Oops, That’s Not What I Want!
How Do I Prevent The Email Zap From Executing Again Everytime I Update The Record?
There are a few different ways to prevent this from happening. Let’s discuss one now.
Step 1: Create A Zapier Log Table
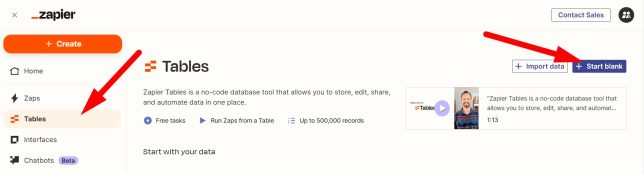
From the sidebar of Zapier click on their ‘Tables‘ option and then the ‘+Start blank‘ button:
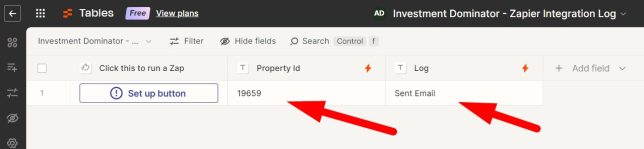
Give your new table a name. In this case, I am calling it “Investment Dominator – Zapier Integration Log” but you can call it whatever you want. Click the ‘Create table‘ button to continue:

This table only needs two columns.
I’m going to name one “Property Id” where I will store the property id from my Investment Dominator record and another one called “Log” where I can store some notes on what the action was, that prompted the log. This 2nd column is not needed but it is nice to have if you want to make your zap a little more robust in the future:

Step 2: Adjust Zap To Log And Lookup Actions
Ok, now that we have a place to store our log data. Let’s open our original zap and add three more steps to it.
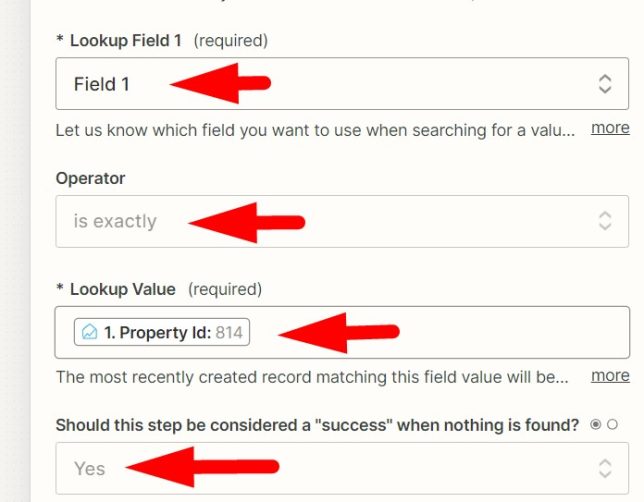
1) First, we are going to add a table look-up step. Or more specifically a ‘Zapier Tables‘ action with a ‘Find Record‘ event:
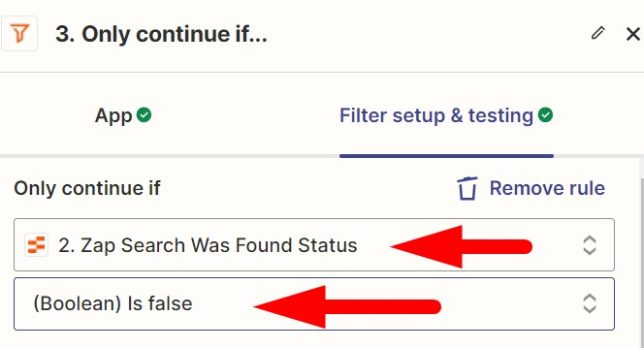
2) Second, we need a filter step that checks the results of the table ‘Zapier Tables: Find Record‘ action, to see if a record was found in the log table with a matching Property Id as the one in our trigger step:
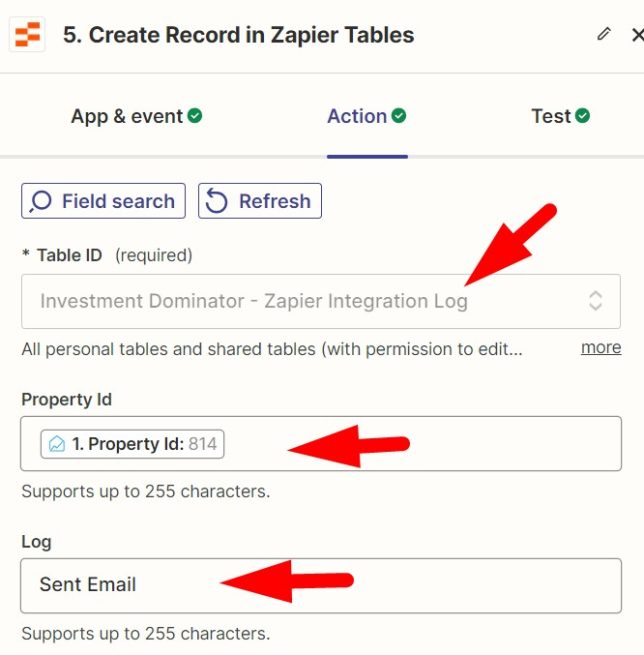
3) Third, after our send email action step we want to add an action that creates a log entry and stores the Property Id record from our trigger step into the ‘Property Id‘ column of our Table and a note like “Sent Email” in the ‘Log‘ column:
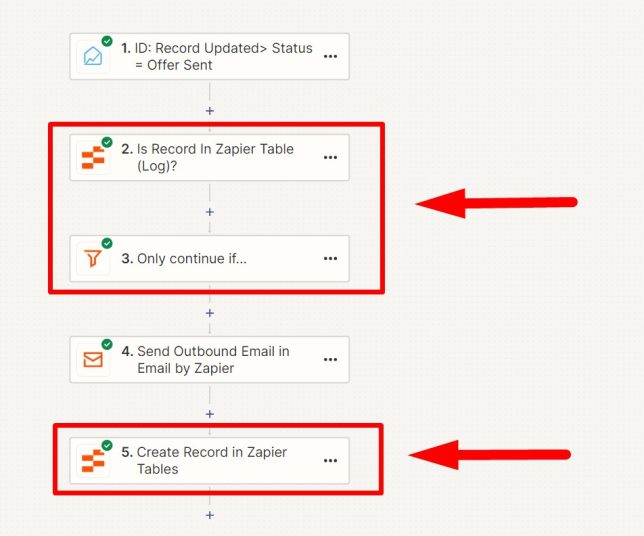
The entire zap should look something like this at this point:
Ok, Did It Work?
To figure out if this works, create a test record in your Investment Dominator with a test email address saved. Then move that record into the ‘Offer Sent‘ status. This should trigger this Zap:

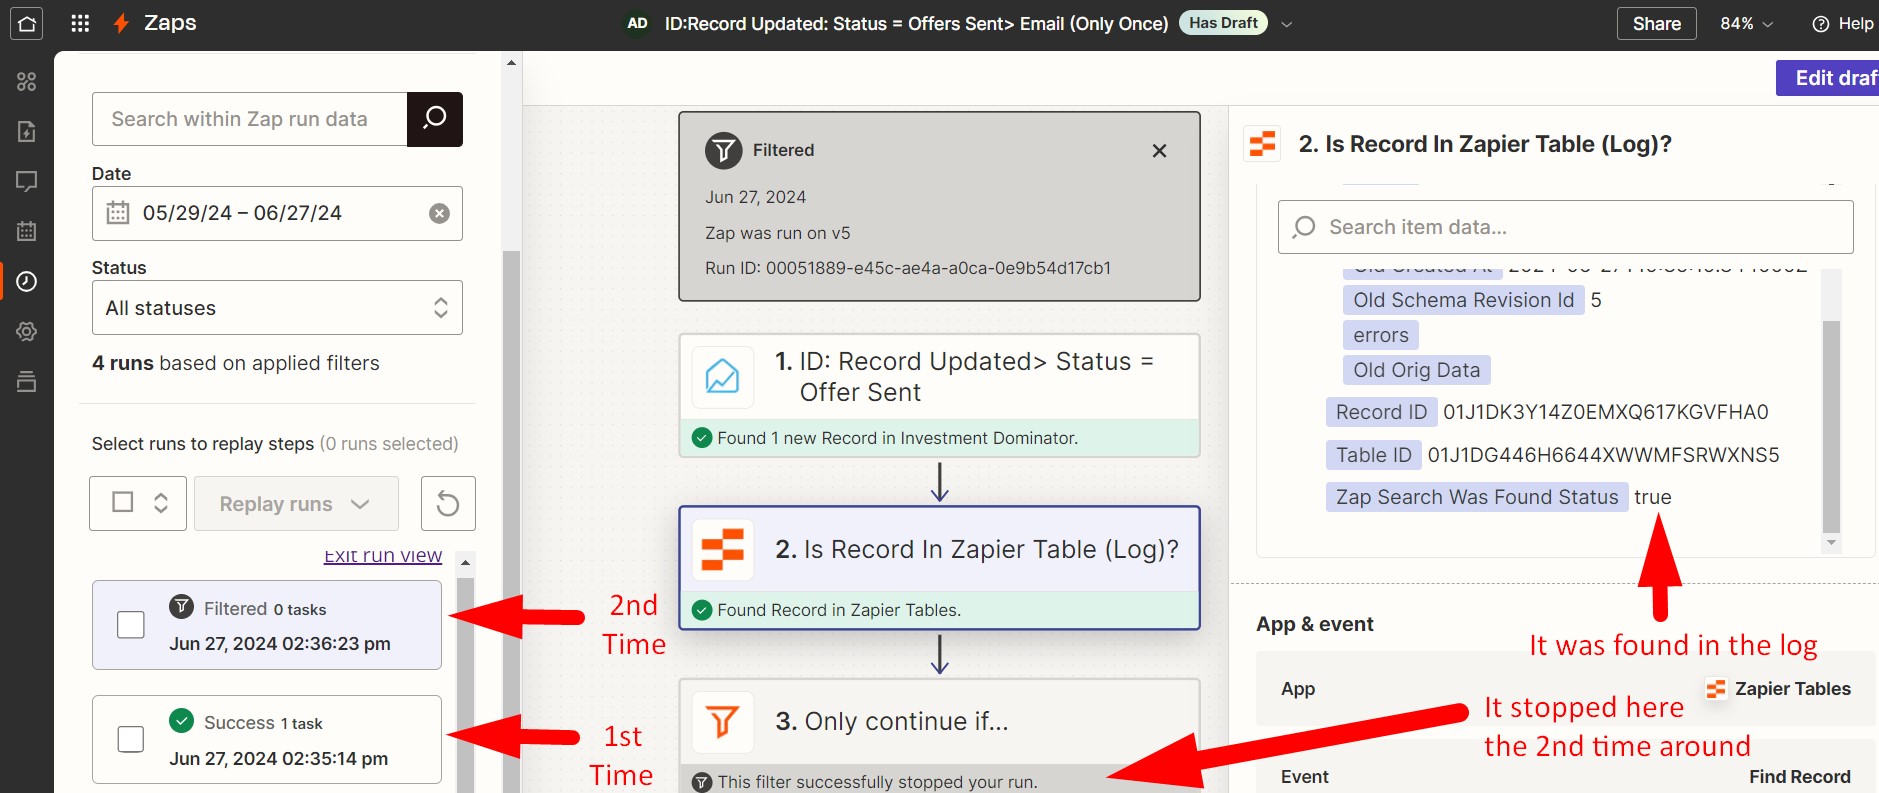
This first time you do this, the email will send however; if you check the Zapier Table log you should see a log record like this:
Go ahead and click the ‘Update Record‘ for that same record in the Investment Dominator to trigger the zap again. This second time you should NOT get the email. If you review the Zap History you should see something like this:
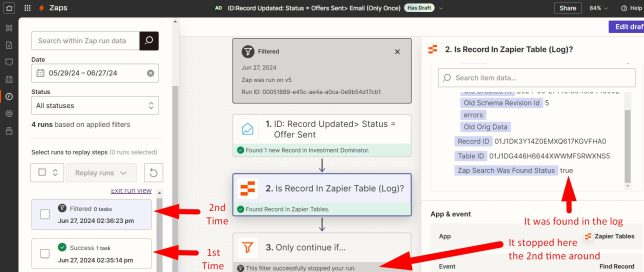
Yay, Looks Like It Worked!
This means now that no matter how many times we update the record in the Investment Dominator when it is in the ‘Offer Sent‘ status only one email is going to send.