You will want to create a user login for each team member that accesses your system so that:
- Their actions can be logged properly in the ‘Activity Log‘ such that you can see an accurate history of actions the user has done.
- Your team can work simultaneously in the system with no issues.
Here’s how you create a new team member login in the system:
- Hover on the ‘Team‘ tab from the top menu.
- Click on the ‘Add User‘ option.

- Select whether you want to create an ‘Admin’ or ‘Rep’ or another account

- Enter in some details about your team member
 NOTE: Be sure to select the timezone that they are located in.
 - Choose a Username and Password for them

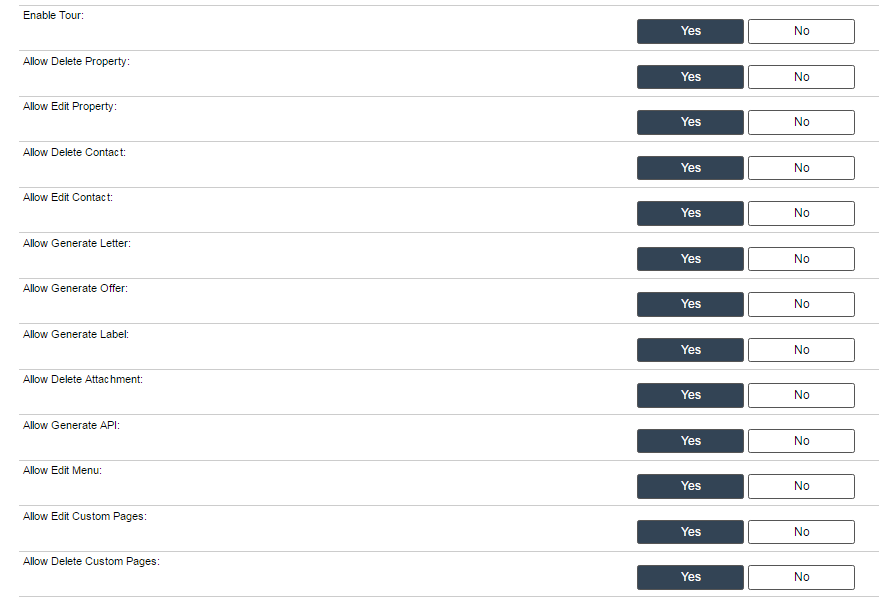
- Next, we want to look into the User Permissions, each separated by a section of the system, so you assign the pertaining permissions to each User. An important update here is that you can give each User to only have access to records Assigned to them. This means that they will not be able to view any records not assigned to them, so they can focus only on their Tasks. These permisisons include:
Land
Access Land Records: All Assigned
Allow Delete Property: Yes No
Allow Merge Property: Yes No
Allow Edit Property: Yes No
Allow Campaigns: Yes No
Allow Generate Custom Documents: Yes No
Allow Generate Letter: Yes No
Allow Generate Offer: Yes No
Allow Generate Label: Yes No
Allow Delete Attachment: Yes No
Allow Import CSV: Yes No
Allow Import From Outside Data Service: Yes No
View Seller Information: Yes NoHouses
Access House Records: All Assigned
Marketing
Access Marketing Records: All Assigned
Allow Delete Contact: Yes No
Allow Edit Contact: Yes NoTasks
Access Tasks: All Assigned
Allow Delete Tasks: Yes NoNotes
Access Note Records: All Assigned
View Notes (Owner Financing): Yes No
Allow Add Note (Owner Financing): Yes No
Allow Edit Note (Owner Financing): Yes No
Allow Delete Note (Owner Financing): Yes NoTeam
Access Team: All Assigned
System
Allow Generate API: Yes No
Allow Edit Menu: Yes No
Allow Edit Custom Pages: Yes No
Allow Delete Custom Pages: Yes No
View Financial Reports: Yes No
Allow Export: Yes No
Access Customize Section: Yes No - Click the ‘Finish Add User‘ button to add the account.
 NOTE: The new user that you create will login at the same login page as you do only using their unique username and password.

