Step 3: Adding Custom Statuses
Hello Again, From what we discussed in How to Manage Offer Campaign Part 1 we now have a firm understanding of the Default Deal Flow Setup and now we want to learn how to add our own custom Statuses. In order to do that let’s start with the custom statuses for the Prospect Stage.
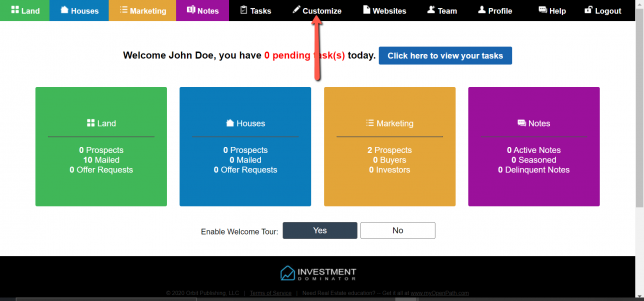
So if you are now just starting from this tutorial go ahead and log into your investment dominator. Go ahead and follow the arrow in the picture above pointing to the customize section.
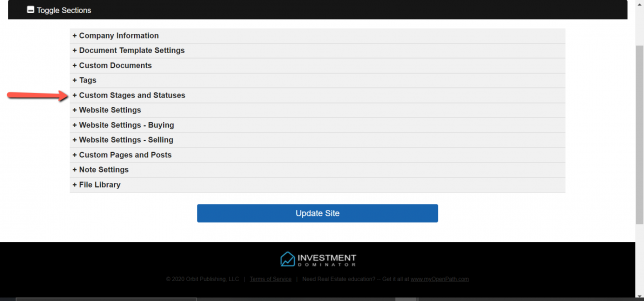
From the customize section go ahead and click on ‘Custom Stages and Statuses’ then this page will open up like so:
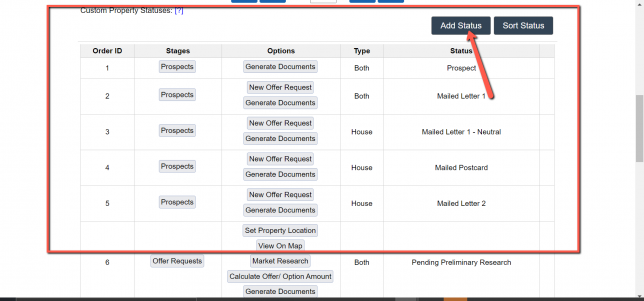
Proceed to scroll down until you hit a section in which you can add your own status which you can see represented by the arrow above.
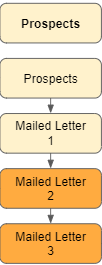
Following the chart from How to Manage Offer Campaign Part 1 for the purposes of this article, we are going to focus on the ‘Prospect’ stage and create our ‘Custom Statuses’ which are represented as orange. Just as a reminder the beige is the default deal setup which you can go over again from the article linked to part 1.
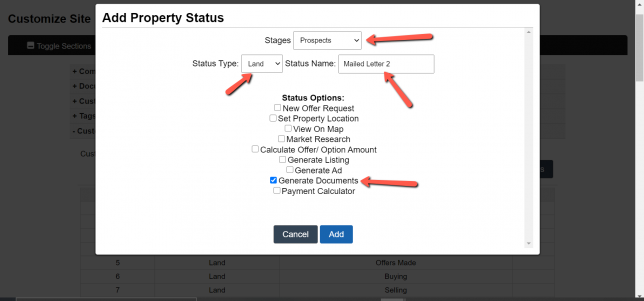
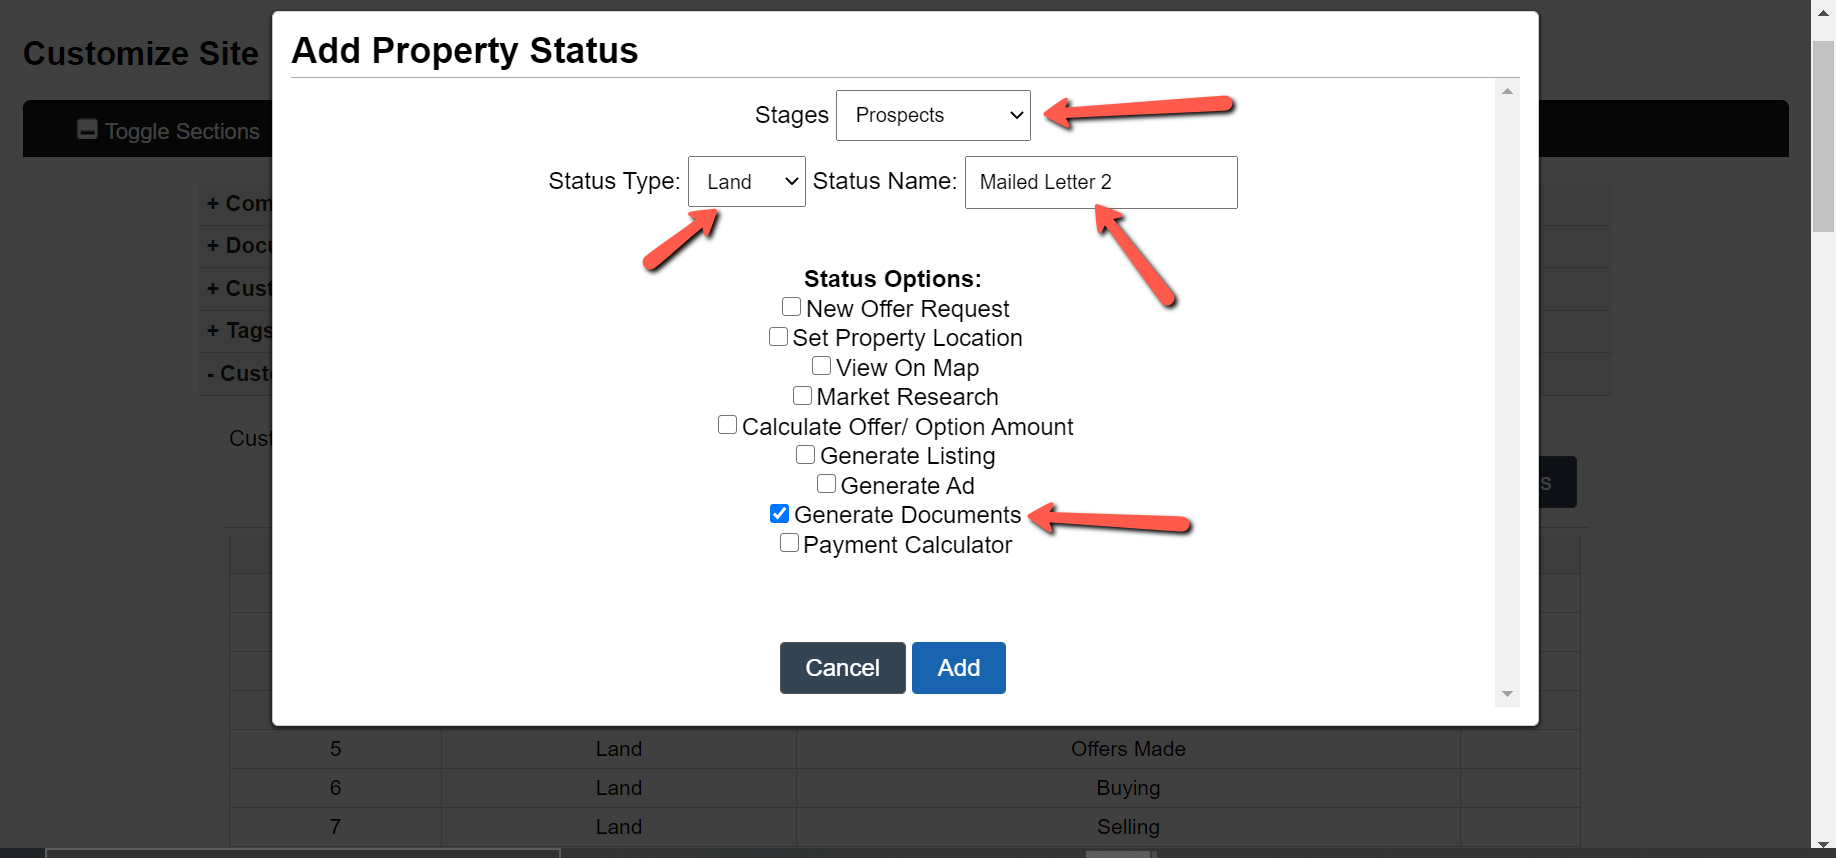
You will be introduced by a window asking you about the ‘Custom Status‘ type you wish to create go ahead and choose Land. You will then notice from the arrows above the fields which need your attention. Since we are in the ‘Prospect Stage’ and looking to add on additional letters. Following our ‘Mailed Letter 1′ will be ‘Mailed Letter 2’ which goes under the ‘Status Name’ then under ‘Status Options’ click the checkmark for ‘Generate Document’ after this go-ahead click the add button.
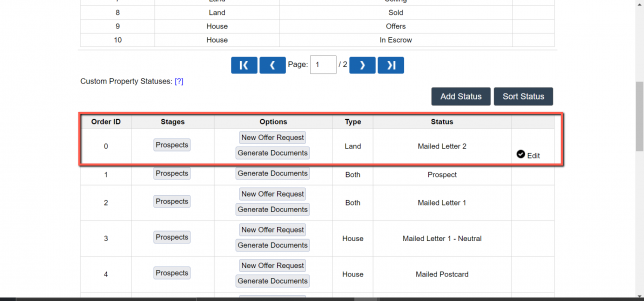
You will now see after adding the custom status it now shows up under the ‘Custom Property Status’ highlighted in a red box above. Now for the purpose of this tutorial let’s generate a ‘Mailed Letter 3’ which we will repeat the same steps we did for ‘Mailed Letter 2’.
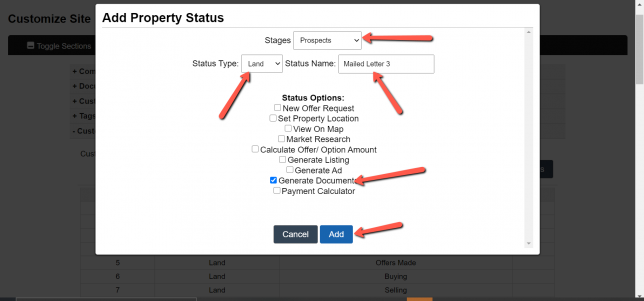
Keep in mind it’s the same steps as before, but for ‘Status Name’ put ‘Mailed Letter 3’. Now after hitting the add button you should see your newly created ‘Statuses‘.
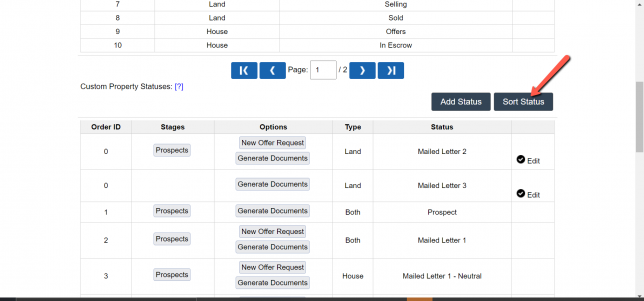
From this point, we now need to correct the order in which our Statuses will communicate with each other just like how we have it in our diagram above. Go ahead and click the ‘Sort Status’ button to the right of the ‘Add Status’ button.
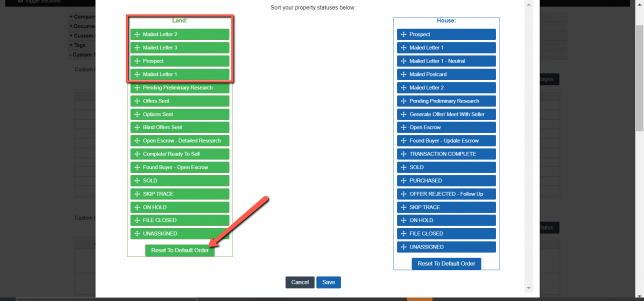
You will now be prompted with a window showing you the Custom Statuses we have created. Since we are primarily working on Land you can see above ‘Prospect’ are the custom statuses we created. These are out of order and in order to change this, we can drag and drop them below. Like so :
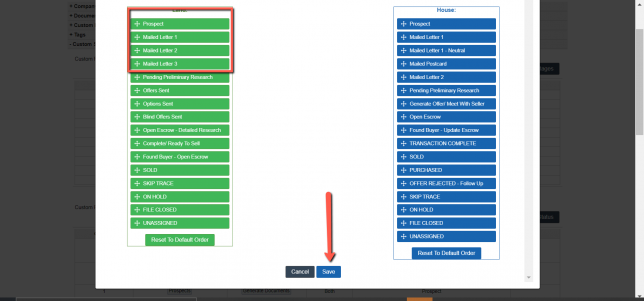
So first should be ‘Prospect’ then ‘Mailed Letter 1’, and then both custom statuses following respectively. Then all you would have to do is click the ‘Save’ button to finalize everything we have done. Now for the final part of this, we will be adding custom documents that will be attached to your custom statuses. You can find this on How to Manage Offer Campaign Emails Part 3

