
Campaigns> Start Campaign> REIPrintMail
If you have our native REIPrintMail integration set up and enabled, direct mail campaigns in the Investment Dominator are a breeze. Follow the steps below to create a Direct Mail campaign that is printed, prepared, and sent out for you by the REIPrintMail service.
Step 1: Start A Campaign
There a several ways you can get to the campaign screen from the Admin Console:
- You can use the top navigation menu, then navigate to the ‘Land> Campaigns’ page.
- You can use the ‘Send Letters’ wizard, then click on the ‘Use A Mailing Service’ option.
- You can click the ‘Campaigns’ button at the top of the ‘Land’ screen.
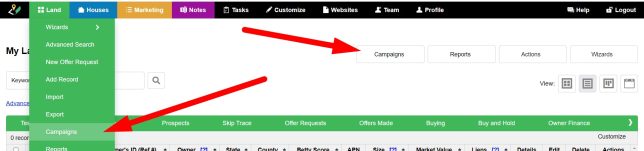
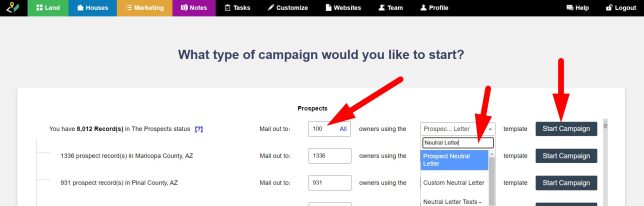
Use one of the methods above to navigate to the ‘Campaigns’ page, then from there, select a segment of records that you would like to mail to. For example, if you have 8,012 records in the ‘Prospect’ status you could choose to mail to a smaller segment of them like 100 by entering in 100 in the ‘Mail out to’ field.
Under the ‘owners using the> Search for template…’ dropdown do a keyword search for a document template and select the one you would like to use.
Then click the ‘Start Campaign’ button:
Step 2: Select The REIPrintMail Option
On the next screen select the ‘REIPrintMail’ Option:

Then click the ‘Next – Continue’ button to move to the next step.
Step 3: Prepare Your Order
In the first part of the process, you’ll need to decide what type of postage you would like REIPrintMail to use. ‘Standard’ will get you a cheaper rate, but ‘First Class’ will arrive faster to the mailbox of your recipient:
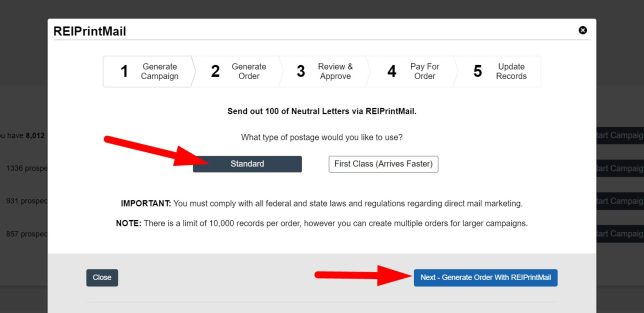
Once you make your postage selections click the ‘Next – Generate Order With REIPrintMail’ button to continue.
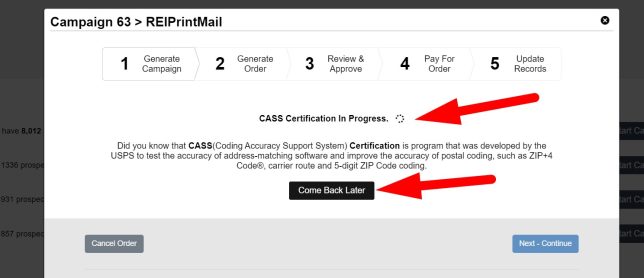
Step 4: Verifying Recipient Addresses with CASS
On the next screen, you’ll notice that your recipient list is being verified by REIPrintMail through a CASS Certification process. This step may take a few minutes to process and longer if you have a larger mailing list.
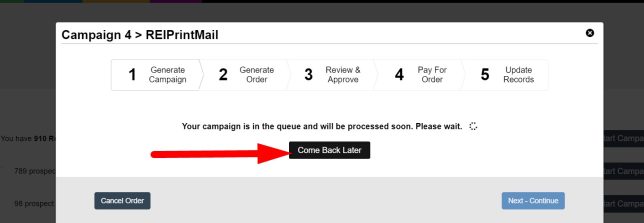
NOTE: We do have a ‘Come Back Later’ option on this step, that you can select if you do not have time to wait the few minutes that it will take to complete this step:
Once the CASS Certification has completed, you’ll be taken to a summary screen and if you have any bad addresses, you will see them listed in a table:
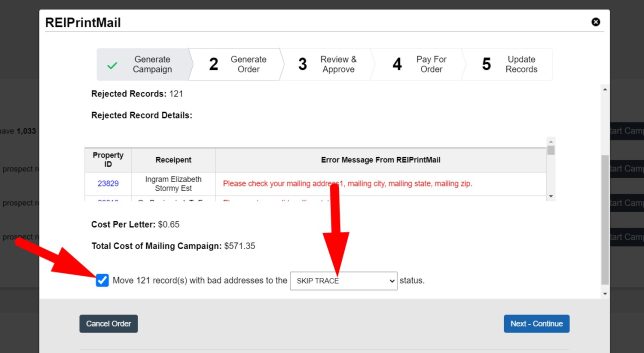
You can choose to move any of the records with bad addresses that fail the CASS certification into the ‘SKIP TRACING’ status to research their correct mailing addresses at a later time. For more information about skip tracing click here.
Step 5: Proof Your Order
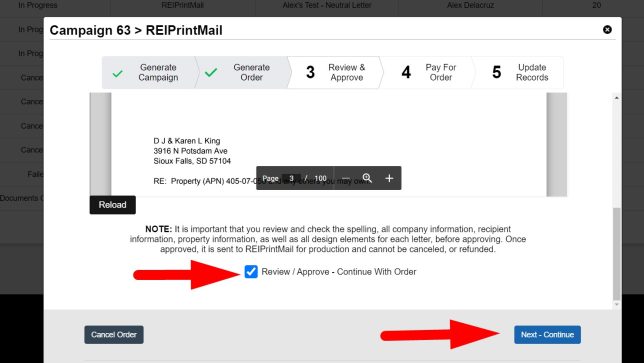
On the next screen, you can preview each of your letters. Take a moment to carefully review and proof these documents because this is the file that REIPrintMail will be using to print your order.
If everything looks good, check the option that says ‘Review/ Approve – Continue With Order’ then click the ‘Next – Continue’ button to move to the next step:
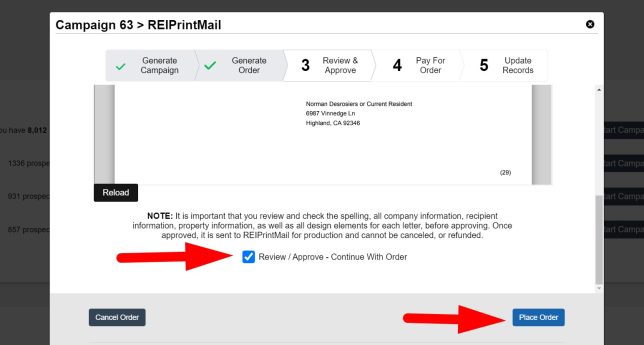
On the next screen you will need to review and proof your envelopes. Again, here you’ll want to pay special attention and review these documents in detail because this is the file that will be sent to REIPrintMail.
If everything looks good, check the option that says ‘Review/ Approve – Continue With Order’ then click the ‘Place Order’ button to move to the next step:
Step 6: Pay For Your Order
On this next screen, you’ll need to enter in your payment details for the order. At the top of the screen, you’ll notice a couple important pieces of information:
- Your REIPrintMail Order Number
- The Amount Due for the order:
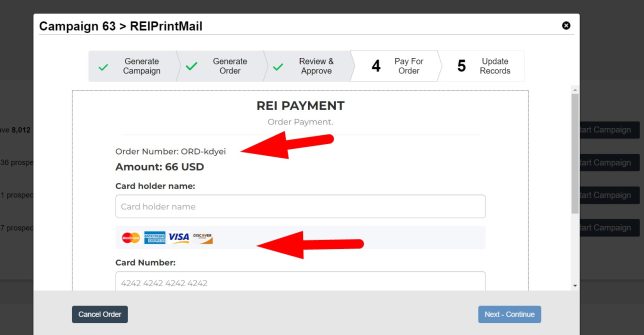
Once you enter in your payment details and click the ‘PAY’ button, your payment will process with REIPrintMail and if successful, the ‘Next – Continue’ button will activate, allowing you to finalize and complete the order.
Tracking The Progress of Your REIPrintMail Order
If you scroll down to the bottom of the ‘Campaigns’ screen, you can find the ‘Campaign History’ section. Under this section you can access a list of your campaigns:
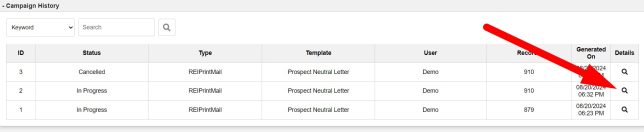
A few key areas of focus under this section are:
- The ‘Status’ column indicates if the campaign is In Process, Cancelled, or Complete.
- Under the ‘Type’ column ‘REIPrintMail’ will display if the campaign was setup through that integration.
- The ‘Template’ column shows you what document template you selected for that campaign.
- The ‘User’ column shows you who on your team initiated the campaign.
- The ‘Records’ column shows how many records (recipients) are included in that campaign.
- The ‘Generated On’ column tells you when this campaign was first initiated.
- And the ‘Details’ column has an icon you can click that opens the campaign screen for that particular campaign. In the case of campaigns that are in the ‘In Progress’ status, you can click this icon to go back to the exact step of the campaign that you left off at. If you had clicked the ‘Come Back Later’ option during the campaign setup process this is the option to click in order to get back to where you were.
The ‘Come Back Later’ Option and ‘Campaign History’ Section
This helpful option allows you to work on other important tasks, while your campaign is processed in the background, then come back later and start back up where you left off.
There are two areas that you will see the ‘Come Back Later’ option appear:
1) For each of the screens where the process might take more than a few minutes you will see a ‘Come Back Later’ button appear that looks like this:
If you select this option, you will be taken to the ‘Campaigns> Campaign History’ section where you will see your order under the ‘In Progress’ status.
If you click the ‘Details’ icon, to the right of the campaign record, you will be taken back to the exact point where you left off in your order.
2) The other area where you will see at come back later option is if you close out of the campaign screen. When you do that, you should see a warning asking you if you would like to ‘Cancel Order’ or ‘Exit, Come Back Later’:
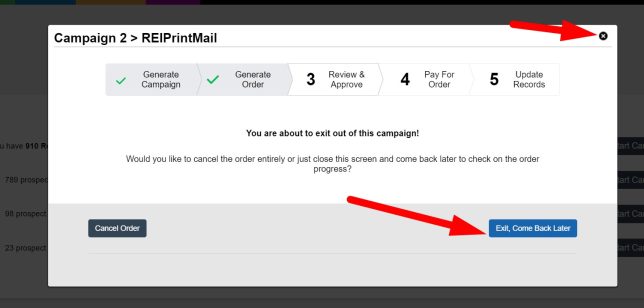
If you select the ‘Exit, Come Back Later’ option it will take you to the ‘Campaigns> Campaign History’ section where you will see your order under the ‘In Progress’ status.
If you select the ‘Cancel Order’ option, your order with REIPrintMail will be cancelled and you will be directed to the ‘Campaigns> Campaign History’ section where you will see your order under the ‘Cancelled’ status.
Want to learn more about our REIPrintMail Integration? Check out: