Google Tag Manager is a free tool that allows you to deploy and manage all your tracking scripts and pixels from all platforms in one centralized place.
How To Get Started
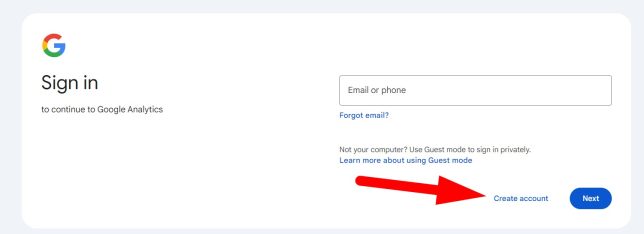
The first step is to create a free Google Tag Manager account (if you don’t already have one). You can go to https://tagmanager.google.com/ and click the ‘Create account‘ link to sign up:

Generate An Account And Tag Manager Container
Once you are set up with an account, log in and click the ‘Create Account‘ button:

Give your account a name:

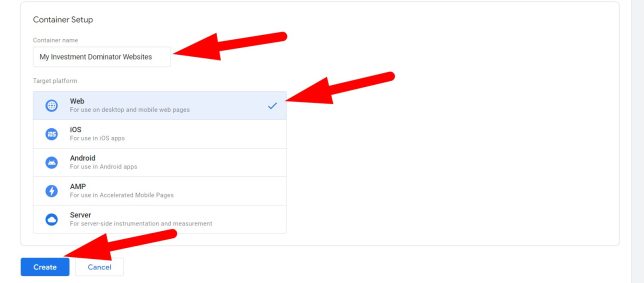
Name the container and select the ‘Web‘ option for the target platform, then click the ‘Create‘ button to continue:

It will then have you review and agree to their terms.
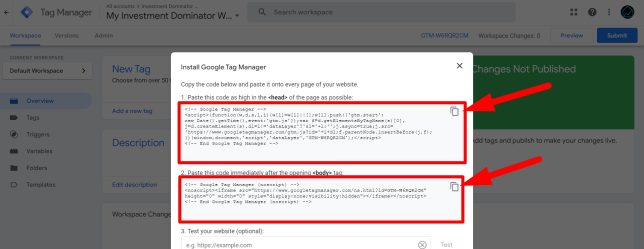
Then it’s going to generate some code snippets for you to install on your website:

Click the copy icon to the right of the <head> tag to copy the code snippet to your clipboard.
Add Tag Manager Code Snippet To Your Investment Dominator CRM
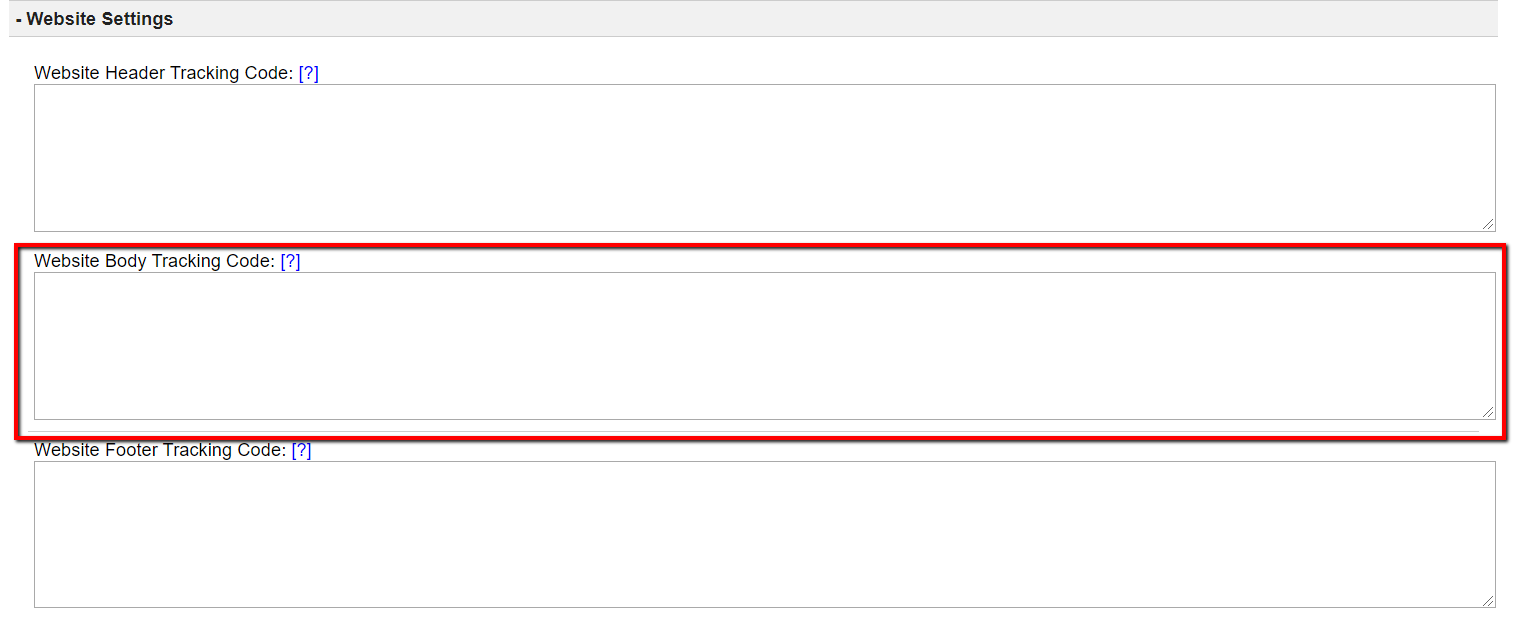
In your Investment Dominator Admin Console navigate to ‘Customize> Website Settings‘ and paste the <head> code into the ‘Website Header Tracking Code‘ field:

Go back to Google Tag Manager and copy the <body> tag, then paste that into the ‘Website Body Tracking Code‘ field of the Investment Dominator:

Scroll to the bottom of the page and click the ‘Update Site‘ button to save these changes:

Verify
You can enter either your Buying Site or Selling Site domain into the ‘Test your website (optional)‘ input and click the ‘Test‘ button to verify that Tag Manager is successfully installed on your Investment Dominator websites:

Additional Resources:
To learn more about how to use Google Tag Manager and add tracking pixels to it, please check out these additional helpful articles:
- How To Add Google Analytics To Tag Manager: https://support.google.com/tagmanager/answer/9442095?hl=en
- How To Add Facebook Pixels To Tag Manager: https://www.facebook.com/business/help/1021909254506499
- The Google Tag Assistant: https://tagassistant.google.com/

